Tuesday, December 15, 2009

Padellata di funghi, castagne e scalogno

i.e.: mushroom, chestnut and shallot saute’ – directly from Italy and my personal contribution to Thanksgiving 2009, along with a turkeymisu’ :)

(serves 6)

350 g chestnuts, blanched and peeled (but I used preserved all natural chestnuts, because peeling them is not the funnest thing in the world)

2 garlic cloves

2 rosemary sprigs

4 small shallots, peeled and cut in halves

4 green cabbage leaves, cut in stripes

250 g chanterelle mushrooms (actually, this time I used crimini mushrooms and it was delicious all the same – the chanterelles add a nice touch of yellow, though)

1 cup of white wine

½ cup of vegetable broth

Sauté the garlic and the shallots in 4-5 tablespoons of oil. Add the chestnuts (only if they’re not precooked, otherwise wait until the end, to keep them from getting mushy). Cook for about 5 minutes, then add the mushrooms and the rosemary and cook for a few more minutes.

Add the white wine and let simmer on high heat until almost dry.

Season to taste with salt and pepper.

Add the cabbage and pour the broth.

If you’re using precooked chestnuts, add them NOW!

Let simmer for another 10 minutes.

Ecco fatto! Perfect as a side for meat – happy meat, of course.

Tuesday, September 15, 2009

Scrumbtious apple+ crumble

Hello everyone,

Don’t you think there isn’t enough dessert in this blog? Well, I definitely do, so here’s an easy and, of course, delicious recipe for y’all sweet-toothed fruit lovers!
This cake is traditionally made with apples, but I guess any fruit – or fruit combination – will do. The last time I prepared it, I used apples, nectarines and raspberries:

2-3 apples (golden delicious or granny smith)
2-3 nectarines
about 100 g raspberries

For the crumbles:
150 g sugar (caster or brown)
150 g flour
100 g butter, cold (I prefer salted)

Cinnamon if you like it

Preheat the oven to 400*F.

Peel the apples, cut them into quarters and then each quarter in 2. Do the same with the nectarines (I didn’t peel them, actually).
Arrange the fruit pieces in a buttered 23x20 cm rectangular oven dish.


Mix the flour and the sugar. With your fingertips or a fork, rub the butter into the flour mixture until it forms coarse crumbs (if you don’t get crumbs but a more uniform dough, just leave it for 15 min in the fridge and it should acquire the right texture).


Sprinkle the fruit with the crumbs.


That’s it!
Now bake in the oven for about 30 min, and once the top is golden brown and the fruit is cooked, let cool at room temperature.


And eat! :)

Monday, August 31, 2009

Corn Relish-ious!

Okey doke! So last weekend, Todd and I got a pile of veggies from our CSA as usual, and knowing that we were likely to get more corn than we could shake a stick at (at least in a single week) I figured I should look into new and interesting ways of processing corn! We had already frozen some earlier this summer, so that option was out. Looking around online, I found a few recipes for corn relish.

Here's what you need to make this happen:

4 ears of corn
1 onion
1 red bell pepper
1 sweet green pepper
1/8 cup sugar
1 cup vinegar
1/2 tbsp salt
1/2 tsp celery seed
1/2 tsp mustard seed
1/2 tbsp dry mustard
1/4 tsp turmeric

If you want to add a spicy kick to it, add some spicy peppers...I think the ingredients are pretty flexible so long as you maintain a safe level of acidity overall. I wanted keep the corn sweet, so I didn't take that route.

Now, how it's done:

1 - Blanche the corn in boiling water for 5 minutes, then transfer to ice cold water for 5 minutes. Once cool, cut the corn off the cob. This should yield about 2 cups, give or take.

2 - While that's going on, chop up your onion and peppers into itty bitty bits. I obliterated them in my food processor, which was super-quick. If you don't have a food processor, buy one (or get married so that other people give it to you)! :) It's totally worth it.

3 - Combine the chopped up onions, peppers, salt, sugar, vinegar, mustard seeds and celery seeds in a large deep saute pan and bring to a boil on medium heat. Once boiling, simmer 5 minutes.

4 - Add dry mustard, turmeric and corn to the mixture and simmer another 5 minutes.

5 - If your mixture feels too liquidy (which it will if you obliterated your veggies in your handy dandy food processor like I did) you'll want to add a bit of a flour/water mixture to thicken it up slightly. Mix 1/4 cup of flour with a little more than a 1/4 cup of water to make the paste, then add to the pan. Stir continuously, as adding the flour mixture will lead to a tendency for the food to stick to the pan.

6 - Ok, so while all that stuff was going on, you should have been preparing your jars and water bath for canning. Take the pan off the heat and fill your prepped jars with the relish, leaving a 1/2" headspace and process for 20 minutes in a boiling water canner. You should get about 2.5 pints from this recipe.


If you store the cans in a cool, dry place, the relish will be good for a year or so. Apparently it's quite tasty with catfish or a burger. We'll let you know when we give that a shot a few months down the road. In the meantime, I had the leftovers that didn't fit into the jars with my salad for dinner today. Look how pretty!

Sunday, May 31, 2009

Go Fish! On the grill.

Summer's quickly approaching. There are two things I love about these warmer months. Sitting on my porch drinking a cold beer and grilling. Now, I'm not a big meat-eater, but grilling season is my one big exception. For those of you that love the spirit of the bar-b-que, but have an aversion (voluntary or otherwise) to red meat, don't despair! With the thawing of rivers in Alaska and in British Columbia come the opening of the Salmon season. Now through August is the best time of year (in most respects, the ONLY time of year) to find fresh, never-been-frozen wild-caught salmon at a grocery store/fish market near you. Salmon does amazingly well on the grill, especially if you cedar plank your fish. But I'm not here to talk about grilling salmon fillets. Today, I want to share with you a recent and decidedly delicious discovery.

The Fabulous Wild Mushroom Salmon Burger.

This is an incredibly easy, fast, and delicious alternative to the standard burger/brat faire. Light, yet filling, familiar yet exotic, this is a genuine treat.

So here's the rundown:

2 lbs. wild (preferably fresh) salmon (I recommend Copper River Sockeye or King Salmon), skinned and cubed
1/4-1/2 lb. baby bella mushrooms, diced
1/4-1/2 lb. shiitake mushrooms, diced
1 oz. fresh rosemary, diced finely
1 oz. fresh sage, diced finely
1 oz. truffle oil
1/4 white onion, diced
Panko breadcrumbs, add until mixture solidifies

Take the salmon cubes and break apart with fingers until its broken up into tiny pieces. The more ground up the better. Add all ingredients. Add breadcrumbs until the mixture gains a more cohesive state. The breadcrumbs serve as a bonding agent, so your burger does not fall apart on you. After mixing all the ingredients, including the breadcrumbs, I like to let the mix set in the fridge for at least a half hour, as I find this allows the ingredients to coalesce. Following this, portion out into patties and grill. Depending on the type of salmon you use, one must pay attention to the cooking time. A sockeye salmon will be less oily and less fatty, so it will dry out more quickly than farm-raised or any Atlantic salmon alternative.

If you heed all the instructions but your burger still decides to fall apart, don't despair! I often opt to take my cooked salmon burger and crumble it over a green salad, in lieu of the traditional bun option.

Enjoy.

Friday, May 22, 2009

Murgh Makhani so good, you will probably eat too much, and then feel sick afterwards. Don't say I didn't warn you!

Murgh Makhani or butter chicken (murgh = chicken, makhani = with butter) is a dish that I have been working on getting just right over the last couple of months. I made it again while down in Florida this week, and it came out quite well. This is a pretty easy to make chicken curry, though it requires a few hours of marination, so you will need to plan ahead! Here is what you will need:

Marinade:
1-2 Pounds Chicken (boneless, skinless thighs)
1-3 Teaspoons Chili Powder
1 Lime
Salt
5 Cloves Garlic
1 Finger length piece of Ginger
2 Tablespoons Plain Yogurt
2 Tablespoons Garam Masala
1 Tablespoon Melted butter

Makhani Gravy:
1/2 Stick of Butter
1 Tablespoon Cumin Seeds
1 Large Onion
1-3 Hot Peppers (depending on desired heat)
1 Teaspoon Turmeric Powder
1 Tablespoon Coriander Powder
1 Tablespoon Cumin Powder
1-2 Handfuls Raw Cashews (soaked in water for 30 min)
3-4 Tomatoes
Plain Yogurt

Marination is the process of soaking meat or vegetables in some combination of herbs, spices, liquids, oils, and fats in order to impart extra flavor. Often one of the liquids is an acid like lime juice or wine which helps break down the meat a bit, allowing it to better absorb more of the liquid. For the murgh makhani we use lime juice, yogurt, melted butter, chili powder, salt, garlic, ginger, and garam masala. Combine all the marinade ingredients with the chicken (cut into bite-sized chunks) and allow to chill in the fridge for about 4 hours.


Once the chicken is good to go, melt half a stick of butter in a large sauce pan and fry the chicken until cooked through. Remove the chicken from the pan, leaving enough of the juices behind for cooking the onions, etc. Once the chicken is removed, toss in the cumin seeds and allow them to pop. Then fry up the onions and hot peppers until the onions are nice and soft. Next, add the powdered spices and fry a bit longer. While all this is going on, take the raw cashews (which you had soaking in some water for about 30 minutes by now) and grind to a paste in the food processor. If you don't have a food processor, you can coarsely chop them on the cutting board instead. Add the cashew paste and tomatoes. Salt the tomatoes and cook, covered until the tomatoes reduce. Once the tomatoes seem satisfied, add a spoon or two of yogurt to make things a bit more creamy.

Carefully pour the gravy mixture into the food processor and blend until smooth. Pour the gravy back into the pan, adding the chicken and a bit of water to thin out the sauce a bit. Allow this to cook on low heat for a few minutes. Top with chopped cilantro and extra butter if desired. Serve over rice or with your favorite Indian bread. This dish has been known to cause people to eat more than is probably appropriate, so watch out!


Monday, May 11, 2009

Look Mom, No Neurological Deficit! I Made Shrimp Biryani!

As you may (or may not) have heard I recently had the misfortune of receiving a skull fracture and a subarachnoid brain hemorrhage courtesy of some not-so-friendly DC muggers. It is not the best idea to click that link, as it is pretty frightening, though fortunately my case seems to have been relatively minor. The doctor's hospital discharge papers assure me that I have no neurological deficit! Phew! I was finally feeling up to cooking, and it being Mother's Day and all, I decided to make my mom (and the friends that we are currently imposing on) some shrimp biryani. Also, I figured it would be a good test to make sure there was really no neurological deficit! Well, without further ado, here is how I did made themselves!

Biryani is the general name for the genre of rice-based dishes popular in India and the Middle East. This version seemed to be quite popular in the southern Indian states of Goa and Kerala that I visited last summer, so I thought I would give it a try. Here is what I used:

Marinade:

1 kg Shrimp (peeled) (J wonders if half this amount is sufficient)
1 Lime
Salt
1 Tablespoon Coriander Powder
1 Teaspoon Turmeric

Biryani Base:

1 Tablespoon Cumin Seeds
2-4 Cardamom Pods
1 Large Onion
1 Large Jalapeño Pepper (or more to taste)
4 Cloves Garlic (finely diced)
1 Finger-Length Piece of Ginger (finely diced)
1 Cup Dried Coconut
1 Teaspoon Turmeric
1-2 Tablespoons Garam Masala
1 Tablespoon Coriander Powder
2 Handfuls Raw Cashews
2 Handfuls Raisins
2 Medium Tomatoes (diced)

Rice:

2 Cups Jasmine Rice
Assortment of Cardamom Pods, Cloves, Cinnamon, etc


Start out by marinating the shrimp for at least 30 minutes in the lime juice and spice mixture. Meanwhile start cooking the rice as you would regular jasmine rice but with slightly less water than usual and including cardamom and the other whole spices to give the rice some extra aroma. Stop cooking the rice when it is just about done, but not quite. At this point it's a good idea to remove the whole spices so you don't leave any surprises for people to bite into!

Next, start the base for the biryani. Heat some olive oil, and fry the cumin seeds and cardamom pods. Add the onions, then garlic, ginger, hot pepper, a bit of salt and saute till the onions are soft. Add the coconut, cashews, and raisins and cook a few minutes longer. Add the powdered spices and fry a bit longer. Now add the tomatoes, and cook until they reduce. Now you can add the shrimp and cook until just about done. At this point you could also add some yogurt to give things a bit more creaminess (though I forgot this step last night). Now you should have a nice base for the biryani!

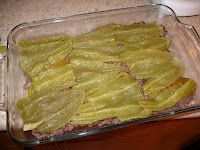
Add in the rice bit by bit, stirring well to incorporate the base into the rice. If the mixture is too dry, add some water, and cook covered for 5 minutes or so, until rice is completely cooked. At this point, I added some sliced tomatoes on top of the rice, which will steam during the 5 minutes of extra cooking, and make a nice garnish.

When everything was done, we turned the pot out onto a large serving tray and this is how it looked. Not bad, for a first try!

Sunday, May 10, 2009

Beat that Flu with Caldo de Queso

Hi all, it's been a while. Before we get started let me make sure that you know how spicy this next dish is. Okay? Okay. Off we go!

For this Caldo de Queso you'll need the following ingredients:
5 poblano peppers
1 sweet onion
3 cloves of garlic
2 tbsp olive oil
5(!) habañero peppers
2 tomatoes
6 small potatoes
1 can of evaporated milk
1 package of queso fresco


Preparation procedure:
1. Char the skin of the poblano peppers until they're black all around, like so (I used a thin grill grate directly on my gas stove):
2. Place the charred poblanos in a sealable bag to induce sweating.
3. While poblanos are sweating, sauté the garlic, onions, and habañeros in olive oil. I chopped up two of the habañeros (don't touch your face!!) and put the remaining three in whole. Add some salt so the onions release some of their liquid and prevent burning.
4. Chop up the tomatoes and add to the softened onions. Add salt and oregano and stew until the tomatoes soften.
5. Chop up the potatoes and add them to the pot. Add water until everything is covered. Bring to a boil then simmer until the potatoes are soft.
6. While the potatoes are softening, remove the poblanos from their sauna and peel off all the by-now-easy-to-peel outer layers. Then chop 'em up, like so:
7. Cube the queso fresco and add it to the pot, along with the chopped poblanos and the evaporated milk. Simmer, allowing the flavors to combine, adding salt as necessary.
8. There's no step 8!

The chopped up habañeros provide a base of spice. For the more adventurous among you, experiment (carefully) by opening up the whole habañeros! Don't worry, they're not the spiciest peppers on the planet ;)


Thursday, April 2, 2009

Can I Haz Bacon Blue Cheeseburger?

This weekend we decided to take on the challenge of a good ol' american meal! Choosing not to conform to popular trend, we did not make sliders, but we did make burgers, and we went all the way! It was my first bacon and blue ever so nostalgic it wasn't , but delicious it was! We picked up some Heartland beef, Applegate Farm bacon, Blue cheese, and Organic Brown rice bread (for the gluten intolerant) and went at it.

Burger:
2 Heartland organic beef patties (shaped into a more rounded form)
5 slices of Applegate bacon
4 oz Blue Cheese crumbles
1 tomato
some fresh baby greens
4 slices of Organic Brown Rice bread (or the bun of your choice)

Sweet Potato Fries:
3 sweet potatoes chopped into 1/2" x 1/2" sticks

Spicy Mayo:
1 egg
1/2 cup of oil
1 tbsp vinegar (or lemon juice)
2 tsp chili powder


First let's make your mayo. Wisk only the yolk of your one egg in a bowl. Next stir in the 1 tbsp of vinegar. Then, with a hand beater, beat in the olive oil very slowly. The pace at which you add the oil is very important. After the beater starts leaving traces in the mix, you've got mayo. Once you are satisfied with the consistency, add in the chili powder. Salt and pepper to taste...

Next get the fries in the oven. Preheat the oven to 450. Cut your sweet potatoes into 1/2" x 1/2" sticks and spead them evenly over a baking sheet. Sprinkle them with olive oil, salt and pepper and place in the oven for 15 minutes. After 15, flip the fries and cook them for 10 more minutes. They're done!!

After you get the fries in the oven, get the bacon going. Put the 5 strips in a skillet pan and cook 'til you reach desired crispiness. The first time around we over cooked the bacon. It was still delicious, don't get me wrong, but we could have done without the extra carbon in the body.

When the bacon is cooked, transfer it to a paper towel on one of your dinner plates. Then dump the bacon fat. Place your patties in the same, fatty, hot skillet. The patties cook quickly so make sure you prep everything else while these are sizzling. Chop the tomato, toast the bread, and don't forget to check on the fries!

After you flip the patties place a small yet generous mound of blue cheese on the cooked side of the pattie. Cover the skillet (with patties and cheese) for a couple minutes until the burgers are done. Once the burgers are done and the bread is toasted, it's time to assemble. Place the burger on the toast, the bacon on the cheese mound, the tomato on the bacon, and the lettuce on the tomato. Then top it with the remaining slice of bread.

At this point your fries should be done. Pull them out of the oven and immediately transfer them to a bowl, to prevent them from continuing to char! And that my friends is how to make a good ol' organic, [artificial] hormone and antibiotic free american meal! Enjoy!

Friday, March 20, 2009

But What is the Third Milk?

As you may have noticed, Food de Fa Fa has not held up well during my residence in Washington, DC. Unfortunately I have not been able to cook much since leaving Chicago. Hopefully this doesn't last too long! Just before leaving Chicago, we had a bunch of people over on St. Patrick's Day for Beef and Guinness Stew and Très Leches Cake (Three Milk Cake, if you will). Fortunately, I have a good memory when it comes to recipies! Here is how it all happened:

For the cake:

This cake gets better with age. For best results, start a day or two before you plan to serve it. Contrary to popular belief, the three milks in this cake refer to heavy cream, sweetened condensed milk, and evaporated milk (not cow, goat, and llama milk).

To make the base for the cake you will need:

1 cup all-purpose flour
3 room temperature eggs (whites and yolks separated)
1 cup sugar
1 whole vanilla bean (maybe too expensive to be worth it?)
1/4 cup milk


With an electric mixer, beat the egg whites for several minutes, until they start to form soft, white peaks:


Slowly add in the sugar and mix until firm. Finally, add the egg yolks, one at a time, followed by the milk and vanilla bean (for the vanilla, you should make a lengthwise slit in the bean, and scrape out the paste on the inside of the bean) and mix until smooth. Incorporate the flour. Add this mixture to a buttered cake pan (9'' x 11'' or other cake sized pan) and bake at 325 F for 20-30 minutes.

While the cake is doing its thing, grab a big bowl or cup to mix up the three milks (8 oz cream, 12oz evaporated milk, 14oz sweetened condensed milk). Like so (if you look closely you'll be able to determine the real author of these blog posts...):


Once the base of the cake is done, poke holes in the top with a toothpick or fork and then pour the milk mixture over the cake and refrigerate for several hours (the longer the better).

While the cake is getting chilled, you can make the frosting. For this you will need:

2 egg whites
1/2 to 2/3 cup honey (or corn syrup)

The eggs need to heat up a bit, so you can set a pot of water on the stove and bring it to a boil. Once boiling, turn down the heat a bit and place a heat-safe bowl containing the egg whites and honey in the water. Mix on medium speed for several minutes, monitoring the temperature with a candy thermometer if you can. The frosting is ready once the temperature of the mixture gets to 140 F. If you don't have a thermometer handy, I would say to just keep on mixing until it gets good and firm. This will probably take 5-10 minutes. When it's finished, pour on top of the cake and put back in the fridge until you are ready to serve it up. Mmmmm!


Saturday, March 14, 2009

High Altitude Chile Relleno

Cooking at high altitudes requires a lot of changes from regular elevation cooking. "Why are you talking about high altitude? Aren't you in Chicago?" you might be asking. Well, sometimes, some of us take vacations and, on some of those occasions we choose to go skiing, and on some of THOSE occasions, we go to Copper Mountain, Colorado (elevation: 9712 feet)!

At high altitudes pasta takes longer to cook (since water boils at a much lower temperature) and food can easily get dehydrated (since the air is drier), just to name a few issues. Luckily for us, there's a book out there, written by high altitude cooking veterans, loaded with delicious recipes which circumvent the various pitfalls! We chose to make their Chile Relleno casserole. Casseroles are easy in high altitudes since both the temperatures (oven temperatures) and the moisture levels can be easily controlled.

Okay, on to the ingredients:

20 ounces worth of whole green chiles (we used canned whole chiles since we're not in New Mexico!)
about a pound of ground beef (or bison)
3/4 lbs of grated sharp cheddar (one could use less, in fact it's probably a good idea for the arteries)
3/4 lbs of grated Monterey Jack (again, 1/2 lbs or so would be more than sufficient)
4 eggs, separated, beat the whites until stiff
about 400 ml evaporated milk
2 tbsp flour
1 tsp salt
1/4 tsp pepper
2 cups green chile salsa

On to the cooking steps:

First, butter a large oven pan. Brown the meat and spread into the oven pan as the first (of many) casserole layer. Next, making sure that the green chiles are split (that is, butterflied open) and de-seeded, create a layer of them on top of the meat, like so:


Add a layer of the grated cheddar cheese and another layer of the remaining green chiles, followed by a layer of the grated Jack cheese.

Next, mix the egg yolks, evaporated milk, flour, salt and pepper in a bowl. Fold in the beaten egg whites (beaten with a classy manual hand mixer):


and pour the mixture over the existing casserole layers. Finally, pour on the green salsa and we're ready for the oven:


At our altitude, the dish required about 50 minutes at 350 F. The casserole is ready when the center is somewhat set.

Enjoy this hearty dish accompanied by a salad, refried beans and some tortilla chips!

QUICK, QUINTESSENTIAL, QUICHE!

All of you are certainly aware of the fact that the name “Food de Fa Fa” is a clin d’oeil to the worldwide hit “Fou de Fa Fa” performed by the French underground band “Le vol du Concorde” (don’t know it? Check it out at http://www.youtube.com/watch?v=FUVagbFcSUU)… so you've probably asked yourself many times: where is the French food??? Well, let me correct this oversight with an authentic recipe of quiche lorraine.

You can either buy ready-made puff pastry, or, if you’re feeling more adventurous, make the crust yourself with:
180 g (1 ¾ cups) flour
100 g (½ cup) butter
1 egg
¼ cup of water
Mix all the ingredients together and let the dough stand for a few minutes.

Second step: the filling! Here are the ingredients:
200 g (½ lb) of bacon (we used Applegate Farms)
50 g (½ cup) flour
2-3 eggs
¼ l (1 cup) sour cream
1 glass (½ cup + 2 tablespoons, precisely!) of milk
150 g of gruyère cheese
Salt, pepper, ground nutmeg.


Cut the bacon in strips and sautee’ them in some butter and oil.
In a bowl, mix the flour with the eggs, the sour cream and the milk. Add salt, pepper and nutmeg to taste.

Now, roll out the dough and transfer it into a buttered pan.

Cut the gruyère cheese in slices and arrange them on the crust. Add the bacon. Pour the egg, flour and sour cream batter on top of everything.

Cook in the oven at 375oF for about 30-40 min or until golden on top.

Et voila’, very easy! Enjoy warm with a side salad.


Sunday, March 8, 2009

Ropa Nueva

Hola muchachos!

Today we take on a Cuban favorite, ropa vieja (old clothes), a recipe that comes in very handy when you have a hunk of leftover meat that someone forgot on a cooling barbecue grill... This particular piece o' meat was rescued with minimal surface browning and, as we'll see, was turned into the protagonist of this caribbean culinary experience!

Okay, on to the recipe, starting with the ingredients:

For braising the meat:

1 kg beef (skirt or flank steak, we used chuck roast and it was fine)
1 large onion, coarsely chopped
1 carrot, coarsely chopped
2 ribs of celery, coarsely chopped
2-3 cloves garlic, bruised
1 teaspoon salt
1-2 teaspoon ground cumin
1-2 teaspoon oregano
4 whole black peppercorns

For the final product:

1 large onion, cut into thin strips
1 green pepper, diced
2-3 cloves garlic, finely chopped or paste-ified
0-10 hot peppers as you like
4 large tomatoes, diced
2 teaspoons oregano
1 tablespoon ground cumin
1 cup frozen peas, defrosted
1 large yellow or red pepper, cut into thin strips
salt & pepper

The preparation takes quite a bit of time, so this is a good one to make if you don't feel like going outside for a few hours on a cold rainy Sunday. First you need to braise the meat. As our particular piece of meat had already spent some time on the grill, we skipped the initial searing and directly added the meat to the pot along with all the ingredients for the braising. Add enough water to cover the meat and veggies.


Bring to a boil and then let simmer uncovered for 1 to 2 hours or until the meat is nice and tender. Remove the pot from the heat and let cool. Once cooled, remove the meat from the pot and set aside on a plate and cover. Next strain the braising liquid and return the liquid to the heat and allow to reduce to 2 cups. Once the meat is cool enough to handle, shred using a fork, a knife, or your fingers.

In a separate pan, heat some olive oil and fry the onions, garlic, and green and hot peppers until the onions are nice and translucent. Add the tomatoes and salt. Cook until the tomatoes reduce, using the back of your spoon to mash 'em up a bit. Add the oregano, cumin, shredded meat and as much of the braising liquid as you like (we added the whole 2 cups, some of us wanted more, even).


Allow this to simmer several minutes in order to further cook the shredded meat. It should be getting nice and juicy! Don't cook it too long, though, or all the good juices will evaporate! This would be a good time to add the yellow or red pepper and cook covered until the peppers are tender.

As an added bonus we decided to include some fried plantains. For the plantains, we found a hitherto unknown (to us) technique and tried our hands at it.

First, chop up two plantains into medium-sized pieces and fry in oil until they begin to brown. Remove from the oil and pat dry with a napkin, then place in a bowl filled with 2 cups of water and 2 tablespoons kosher salt (you can also add some finely chopped or paste-ified garlic to this mixture). Let the plantains sit in the water for a minute or two, pat dry again and return to the oil to fry for another few minutes on each side. This double frying gives the plantains a delicious savory quality.


And here is what it all looked like, served on white rice. Me gusta!


Yellow Daalicious

In Indian cuisine, daal refers generally to beans or pulses (e.g. lentils). The kind of daal used in this dish is masoor daal, split red lentils. This is one of my favorite dishes to make, partly because it is pretty hard to mess up (I even burned it a bit when I made it the other night and it was still really good). The procedure follows the same general pattern as many of the other
Indian dishes we've posted, and then the lentils are cooked in coconut milk. Here is what you'll need to assemble.

1 tablespoon black mustard seeds
1 tablespoon cumin seeds
1 large onion
1 finger-length piece of ginger
3-4 garlic cloves
1-4 chili peppers
1.5 teaspoons turmeric
1.5 tablespoon coriander
1 tablespoon cumin
1.5 cups split red lentils
13.5 oz (400 mL) can of your favorite coconut milk

Fry the mustard and cumin seeds in oil or butter. Once they start to pop, add the onions, garlic, ginger, and chilis and cook until onions are tender. Something like this:


Add the powdered spices and salt and fry a bit longer. Add the lentils, coconut milk, and enough water to cook the lentils and bring to a simmer. Stir occasionally and add more water if needed. Once the lentils are nice and soft, you are ready to serve over white rice.


Mmmmm! Daalish!

Thursday, March 5, 2009

Parmigiana~!

Hi there. First guest blog! By Enri! Okay, enough with the exclamation points.

So, onto Enri's mom's parmigiana di melanzane (eggplants, aubergines, berenjenas, 茄子, еггплантс, etc.).

Here's a picture of the ingredients you'll need (very thoughtful Enri):


First, slice some eggplants and soak under salt for about an hour. Next, prepare a plain tomato sauce with basil/carrots/onions or garlic (cooking time about 40min) (ingredient A). Then, prepare some boiled eggs and when cold pile and slice in small cubes (ingredient B). Cut up some provola (original recipe says "provola silana") into little cubes (ingredient C) and grate some grana padano (ingredient D). Next, fry the eggplants in deep oil (different schools different oils, corn oil was used in this version, olive oil can also be used).

Now assemble your parmigiana as follows:
1. put bread crumbs in a pan that will later go into the oven (so, oven-compatible pan, understood?)
2. cover with fried eggplants to make a continuos layer
3. cover this first layer with ingredients A, B, C, and D spreading uniformly
4. continue for 2-3 layers repeating steps 2 and 3


Now put the pan into the oven for 30-40 mins.

And that's it!

Tuesday, March 3, 2009

Who Wants Some Chowdah?

We decided it was time to take a break from Indian and Italian last night. A hearty fish chowder seemed like a good idea, especially given the inhumanly cold Chicago weather. The chowder (or chowdah as my mom likes to say) that we made was pretty straight forward to prepare and very tasty. Here are the ingredients you'll need:

120 g of bacon (from applegate farms, certified organic and humane)
1 large onion
4 cloves garlic
1 carrot (finely chopped)
2 ribs celery (finely chopped)
1 jalapeño pepper
butter
1 to 2 pounds potatoes
1 liter of chicken stock
3 large tomatoes
2 cups corn (freshly removed from the cob or frozen)
1 kg white fish (we used tilapia and cod)
basil
cream

Chop the bacon and slowly fry in a large, heavy bottomed pot. Once the bacon is nice and crispy, drain off some of the bacon grease (but not all), and add some butter, the onions, garlic, carrot, celery, and jalapeño and cook until onions are nice and not crispy. Add the potatoes and the stock and cook for a few minutes. Taste to see if it could use some salt at this point. Next add the tomatoes and corn and cook until the potatoes are tender. If you'd like to make the chowder a bit thicker, you can mash some of the potatoes against the side of the pot. Now you can add the fish, cut into medium-sized cubes. Cook for 10-15 minutes or until fish looks done. Add a few bunches of freshly chopped basil and up to about a cup of cream depending on how creamy you like your chowder. We served it up with some nice crusty french bread, topped with some feta cheese, and with some white wine. Here is how it looked:

Saturday, February 28, 2009

Why is the Chana so Spicy?

We had some chickpeas that were being neglected, so I figured how about some chana masala (also called chole masala)? We used dried chickpeas, which you must soak for several hours and then cook for a few hours more. Or you could use canned chickpeas, which you open with the can opener, rinse and then you are good to go. This may make you wonder why you would ever want to use dried beans. After a bit of searching here are the pros and cons for each:

Dried Beans
pros: cheaper, more varieties available dried, no metal can = less waste, often have less sodium, no bisphenol-A (used in the lining of many cans and may be harmful to humans), can season while cooking, have a firmer texture, and some say better taste.
cons: take a long time to prepare, you need to soak the beans to rehydrate them (look here for more soaking and cooking info).

Canned Beans
pros: quick and easy.
cons: some chemicals may leech from the can into the beans, sometimes high sodium, may not taste as good.

So maybe dried is the way to go unless you are doing something last minute.

On to the chana! Here is the plan.

2 cups cooked chickpeas
1 tablespoon cumin seeds
1 tablespoon black mustard seed
1 large onion (chopped)
2-4 cloves garlic
1 finger-length piece of ginger
hot peppers (at your discretion)
4 large tomatoes
1 teaspoon cumin powder
1 tablespoon coriander powder
2 teaspoons turmeric
1 tablespoon garam masala
1-2 bell peppers

Fry up the cumin and mustard seeds till they start to pop. Add the onion, garlic, ginger, and hot pepper and cook till the onions seem satisfied. Add the powdered spices and stir up a bit. Toss in the tomatoes and salt. Cook until the tomatoes reduce to a sauce (you can mash 'em up with your cooking spoon to speed things along). Lately I really like throwing things in the blender to make a smooth sauce, so if that floats your boat now would be the time to do it. After blending or not blending you can add the chickpeas and some water if you need to adjust the consistency of the sauce. You can also add some bell peppers at this point and let it simmer. You could also do it with potatoes and you get aloo chole. When we made this last night, I think we got a little carried away with the hot peppers (at least 10 hot thai peppers). I recommend not going this route even if you like spicy, as it was a little in your face. Here is what it looked like when we finished:

Friday, February 27, 2009

Spicy Chuuna

Hola. We did a slight twist on a perennial favorite, spicy tuna pasta.

Without further ado, on to the steps and pics!

Slice up tomatoes and garlic.


Spicy requires capsaicin. So chop up some hot peppers, like so.


Starting with olive oil and garlic, add the hot peppers, and fry for a short bit until properly aromatized but, as usual, not burnt. Add the tomatoes. Add salt (to really get the good tomato flavor you need to not be timid at this juncture). Add a can of tuna (aka, chuuna according to him). Usually we'd use some oregano but, for some reason, we tried it with fresh cilantro this time around. Long story short, the sauce will look like this.


Mmmm. Looks even better with twisty gemelli pasta.


Enjoy!

Saag it to me

A few nights ago (the same night we made the paneer), we made some delicious palak (or saag) paneer. Indian food is probably my favorite kind of food, but it can be a bit labor intensive. An Indian friend of mine once told me that if Indians spent half as much time thinking about how to develop their country as they do in the kitchen, India would be the richest country in the world. That said, if you've already made the paneer or bought some ready-made in the store, this is a relative easy dish to make. Here is how it works.

First see if you have all the ingredients (you can get all the spices in most grocery stores):

1 tablespoon black mustard seed
1 tablespoon cumin seed
1 large onion (chopped)
4-5 cloves garlic (or more if you are into that kind of thing)
1 finger-length piece of ginger (finely chopped or grated)
1-2 hot chili peppers (or as many as you can take)
1 tablespoon cumin powder
1 teaspoon paprika
1.5 tablespoons coriander powder
2 teaspoons turmeric powder
2 tablespoons garam masala
fresh spinach (1 bunch/large bag, hard to have too much)
cream or cream cheese (to give some extra creaminess at the end)

And then?

Most Indian recipes call for ghee (clarified butter), but I usually just use butter or olive oil or sometimes a little of both. Heat some oil and/or butter in a broad pan and add the black mustard and cumin seeds. Fry until the mustard seeds start to pop or turn grey. Next add the onion, garlic, ginger, and hot peppers. Saute until the onions are translucent. Now add the powdered spices (cumin, paprika, corriander, and tumeric). I don't usually measure how much of these I put in, but the measures I listed are my best guess. Stir them up with the oniony mixture and let it fry a bit more (if you need, add more oil). This might be a good time to add some salt as well. I usually add a bit when I am doing the onions and then a bit just before I add the spinach, why? Who knows! Add the spinach and cook covered for a few minutes. Once the spinach is cooked, remove from the heat and carefully pour your concotion into a blender or food processor and blend until smooth. Pour this back into the pan and add water (or leftover whey from making the paneer) until you get the level of thickness that seems appealing to you. Add the paneer, garam masala, the cream or cream cheese (to your desired level of creaminess) and you are good to go! Top with chopped cilantro (or don't) and serve over rice or with some kind of flat bread like chapati or naan.

Thursday, February 26, 2009

Ragu della Mamma

Howdy folks. We tackled one of the classics, ragu, lightly adapting my momma's recipe. Here's a picture of the completed deliciousness.


We did use real meat, beef, in fact, but it's from the good people at Heartland Farms. Very good.

Okay here's the procedure.

Sauté about 3/4 lbs of ground beef in two tbsp of olive oil until the beef gets "poro poro," Japanese onomatopoeia for crumbly (and in this case browned). Add a bit of red (or white) wine (50cc or so) and evaporate. Put in garlic (2-3 cloves), half an onion (not sliced) and bell peppers (cut in half). Add half a liter of strained tomatoes and a bit o' water. (Note: We tried to put fresh tomatoes in a blender and use that but the resulting slurry was too liquid-y and not tomato-y enough. So we added some tomato paste.) Add salt and fresh basil (2 stems). Once that comes to a boil, turn the heat down to low and let simmer for 30-40 minutes. When the onion and bell peppers become soft, it's done. Pour the sauce onto freshly boiled al dente pasta (we used medium sized shells), add some parmesan or pecorino, and you're done.

Here's where you can make some olio santo for some spice. Heat up a good amount of olive oil. Once the oil is hot, add freshly chopped hot peppers and salt and take the pan off of the fire. Let the peppers change color but not burn. Voilá!

Paneer so Fresh it Tastes Homemade

Camembert? Non! Much easier to make than camembert, or probably any other cheese for that matter, paneer is the simple and tasty cheese found in many Indian dishes. All you need to make it is whole milk and some kind of food acid (lemon juice, vinegar, or left over whey from a previous batch of paneer). For this reason paneer is refered to as an "acid-set" cheese. Other, more familiar cheeses, are typically made from rennet (traditionally made from cow stomach) and therefore called rennet-set cheeses. We made some paneer the other night. Here's how you might do it in the comfort of your own home:

Pour some whole milk (we used a half gallon) into a large (preferably thick bottomed) pot and slowly bring to a boil.


The milk will burn on the bottom of the pot if you don't stir regularly or if the heat is too high. So look out!

As the milk comes to a boil it will start to rise rather quickly and will overflow if you don't quickly remove it from the heat. At this point you add the acid (I like to use vinegar) and stir slowly. How much acid you add depends on the quantity of milk used. For half a gallon, I probably use a few tablespoons. Add it slowly while stirring and once you see the curds (the solid part) separate from the whey (the liquid part), you know you've added enough acid.

Continue stirring and press the solid curds to one side of the pot. Now you can strain the curds using a fine mesh or a cheese cloth. This is what you should be seeing:


I usually save the whey to use in place of water the next time I make rice. It gives it a tasty, slightly milky flavor.

Now we need to drain the remaining liquid from the curd. I like to take two identical containers (usually round and not too large) and place the curd in one, and the second on top of it, pressing to force out the liquid. Then you can place something heavy on top of the whole thing to press it down longer. Occasionally pour out the liquid that has collected. I like to let it sit at least 2 or 3 hours before using it. The longer you press it, the less crumbly, more solid, it will be. Now you are ready to use it however you like.

When I put it in a curry, I like to fry it in some oil or butter with some spices first. Here is how much we made from half a gallon of milk and how it looks as part of the delicious palak (or saag) paneer we made:


Just found a cool website about cheese-making, maybe we'll try to make some other kinds of cheese in the near future:
http://biology.clc.uc.edu/Fankhauser/Cheese/Cheese.html