Friday, March 20, 2009

But What is the Third Milk?

As you may have noticed, Food de Fa Fa has not held up well during my residence in Washington, DC. Unfortunately I have not been able to cook much since leaving Chicago. Hopefully this doesn't last too long! Just before leaving Chicago, we had a bunch of people over on St. Patrick's Day for Beef and Guinness Stew and Très Leches Cake (Three Milk Cake, if you will). Fortunately, I have a good memory when it comes to recipies! Here is how it all happened:

For the cake:

This cake gets better with age. For best results, start a day or two before you plan to serve it. Contrary to popular belief, the three milks in this cake refer to heavy cream, sweetened condensed milk, and evaporated milk (not cow, goat, and llama milk).

To make the base for the cake you will need:

1 cup all-purpose flour
3 room temperature eggs (whites and yolks separated)
1 cup sugar
1 whole vanilla bean (maybe too expensive to be worth it?)
1/4 cup milk


With an electric mixer, beat the egg whites for several minutes, until they start to form soft, white peaks:


Slowly add in the sugar and mix until firm. Finally, add the egg yolks, one at a time, followed by the milk and vanilla bean (for the vanilla, you should make a lengthwise slit in the bean, and scrape out the paste on the inside of the bean) and mix until smooth. Incorporate the flour. Add this mixture to a buttered cake pan (9'' x 11'' or other cake sized pan) and bake at 325 F for 20-30 minutes.

While the cake is doing its thing, grab a big bowl or cup to mix up the three milks (8 oz cream, 12oz evaporated milk, 14oz sweetened condensed milk). Like so (if you look closely you'll be able to determine the real author of these blog posts...):


Once the base of the cake is done, poke holes in the top with a toothpick or fork and then pour the milk mixture over the cake and refrigerate for several hours (the longer the better).

While the cake is getting chilled, you can make the frosting. For this you will need:

2 egg whites
1/2 to 2/3 cup honey (or corn syrup)

The eggs need to heat up a bit, so you can set a pot of water on the stove and bring it to a boil. Once boiling, turn down the heat a bit and place a heat-safe bowl containing the egg whites and honey in the water. Mix on medium speed for several minutes, monitoring the temperature with a candy thermometer if you can. The frosting is ready once the temperature of the mixture gets to 140 F. If you don't have a thermometer handy, I would say to just keep on mixing until it gets good and firm. This will probably take 5-10 minutes. When it's finished, pour on top of the cake and put back in the fridge until you are ready to serve it up. Mmmmm!

Saturday, March 14, 2009

High Altitude Chile Relleno

Cooking at high altitudes requires a lot of changes from regular elevation cooking. "Why are you talking about high altitude? Aren't you in Chicago?" you might be asking. Well, sometimes, some of us take vacations and, on some of those occasions we choose to go skiing, and on some of THOSE occasions, we go to Copper Mountain, Colorado (elevation: 9712 feet)!

At high altitudes pasta takes longer to cook (since water boils at a much lower temperature) and food can easily get dehydrated (since the air is drier), just to name a few issues. Luckily for us, there's a book out there, written by high altitude cooking veterans, loaded with delicious recipes which circumvent the various pitfalls! We chose to make their Chile Relleno casserole. Casseroles are easy in high altitudes since both the temperatures (oven temperatures) and the moisture levels can be easily controlled.

Okay, on to the ingredients:

20 ounces worth of whole green chiles (we used canned whole chiles since we're not in New Mexico!)
about a pound of ground beef (or bison)
3/4 lbs of grated sharp cheddar (one could use less, in fact it's probably a good idea for the arteries)
3/4 lbs of grated Monterey Jack (again, 1/2 lbs or so would be more than sufficient)
4 eggs, separated, beat the whites until stiff
about 400 ml evaporated milk
2 tbsp flour
1 tsp salt
1/4 tsp pepper
2 cups green chile salsa

On to the cooking steps:

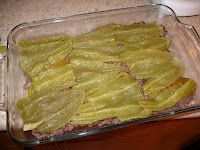
First, butter a large oven pan. Brown the meat and spread into the oven pan as the first (of many) casserole layer. Next, making sure that the green chiles are split (that is, butterflied open) and de-seeded, create a layer of them on top of the meat, like so:


Add a layer of the grated cheddar cheese and another layer of the remaining green chiles, followed by a layer of the grated Jack cheese.

Next, mix the egg yolks, evaporated milk, flour, salt and pepper in a bowl. Fold in the beaten egg whites (beaten with a classy manual hand mixer):


and pour the mixture over the existing casserole layers. Finally, pour on the green salsa and we're ready for the oven:


At our altitude, the dish required about 50 minutes at 350 F. The casserole is ready when the center is somewhat set.

Enjoy this hearty dish accompanied by a salad, refried beans and some tortilla chips!

QUICK, QUINTESSENTIAL, QUICHE!

All of you are certainly aware of the fact that the name “Food de Fa Fa” is a clin d’oeil to the worldwide hit “Fou de Fa Fa” performed by the French underground band “Le vol du Concorde” (don’t know it? Check it out at http://www.youtube.com/watch?v=FUVagbFcSUU)… so you've probably asked yourself many times: where is the French food??? Well, let me correct this oversight with an authentic recipe of quiche lorraine.

You can either buy ready-made puff pastry, or, if you’re feeling more adventurous, make the crust yourself with:
180 g (1 ¾ cups) flour
100 g (½ cup) butter
1 egg
¼ cup of water
Mix all the ingredients together and let the dough stand for a few minutes.

Second step: the filling! Here are the ingredients:
200 g (½ lb) of bacon (we used Applegate Farms)
50 g (½ cup) flour
2-3 eggs
¼ l (1 cup) sour cream
1 glass (½ cup + 2 tablespoons, precisely!) of milk
150 g of gruyère cheese
Salt, pepper, ground nutmeg.


Cut the bacon in strips and sautee’ them in some butter and oil.
In a bowl, mix the flour with the eggs, the sour cream and the milk. Add salt, pepper and nutmeg to taste.

Now, roll out the dough and transfer it into a buttered pan.

Cut the gruyère cheese in slices and arrange them on the crust. Add the bacon. Pour the egg, flour and sour cream batter on top of everything.

Cook in the oven at 375oF for about 30-40 min or until golden on top.

Et voila’, very easy! Enjoy warm with a side salad.


Sunday, March 8, 2009

Ropa Nueva

Hola muchachos!

Today we take on a Cuban favorite, ropa vieja (old clothes), a recipe that comes in very handy when you have a hunk of leftover meat that someone forgot on a cooling barbecue grill... This particular piece o' meat was rescued with minimal surface browning and, as we'll see, was turned into the protagonist of this caribbean culinary experience!

Okay, on to the recipe, starting with the ingredients:

For braising the meat:

1 kg beef (skirt or flank steak, we used chuck roast and it was fine)
1 large onion, coarsely chopped
1 carrot, coarsely chopped
2 ribs of celery, coarsely chopped
2-3 cloves garlic, bruised
1 teaspoon salt
1-2 teaspoon ground cumin
1-2 teaspoon oregano
4 whole black peppercorns

For the final product:

1 large onion, cut into thin strips
1 green pepper, diced
2-3 cloves garlic, finely chopped or paste-ified
0-10 hot peppers as you like
4 large tomatoes, diced
2 teaspoons oregano
1 tablespoon ground cumin
1 cup frozen peas, defrosted
1 large yellow or red pepper, cut into thin strips
salt & pepper

The preparation takes quite a bit of time, so this is a good one to make if you don't feel like going outside for a few hours on a cold rainy Sunday. First you need to braise the meat. As our particular piece of meat had already spent some time on the grill, we skipped the initial searing and directly added the meat to the pot along with all the ingredients for the braising. Add enough water to cover the meat and veggies.


Bring to a boil and then let simmer uncovered for 1 to 2 hours or until the meat is nice and tender. Remove the pot from the heat and let cool. Once cooled, remove the meat from the pot and set aside on a plate and cover. Next strain the braising liquid and return the liquid to the heat and allow to reduce to 2 cups. Once the meat is cool enough to handle, shred using a fork, a knife, or your fingers.

In a separate pan, heat some olive oil and fry the onions, garlic, and green and hot peppers until the onions are nice and translucent. Add the tomatoes and salt. Cook until the tomatoes reduce, using the back of your spoon to mash 'em up a bit. Add the oregano, cumin, shredded meat and as much of the braising liquid as you like (we added the whole 2 cups, some of us wanted more, even).


Allow this to simmer several minutes in order to further cook the shredded meat. It should be getting nice and juicy! Don't cook it too long, though, or all the good juices will evaporate! This would be a good time to add the yellow or red pepper and cook covered until the peppers are tender.

As an added bonus we decided to include some fried plantains. For the plantains, we found a hitherto unknown (to us) technique and tried our hands at it.

First, chop up two plantains into medium-sized pieces and fry in oil until they begin to brown. Remove from the oil and pat dry with a napkin, then place in a bowl filled with 2 cups of water and 2 tablespoons kosher salt (you can also add some finely chopped or paste-ified garlic to this mixture). Let the plantains sit in the water for a minute or two, pat dry again and return to the oil to fry for another few minutes on each side. This double frying gives the plantains a delicious savory quality.


And here is what it all looked like, served on white rice. Me gusta!


Yellow Daalicious

In Indian cuisine, daal refers generally to beans or pulses (e.g. lentils). The kind of daal used in this dish is masoor daal, split red lentils. This is one of my favorite dishes to make, partly because it is pretty hard to mess up (I even burned it a bit when I made it the other night and it was still really good). The procedure follows the same general pattern as many of the other
Indian dishes we've posted, and then the lentils are cooked in coconut milk. Here is what you'll need to assemble.

1 tablespoon black mustard seeds
1 tablespoon cumin seeds
1 large onion
1 finger-length piece of ginger
3-4 garlic cloves
1-4 chili peppers
1.5 teaspoons turmeric
1.5 tablespoon coriander
1 tablespoon cumin
1.5 cups split red lentils
13.5 oz (400 mL) can of your favorite coconut milk

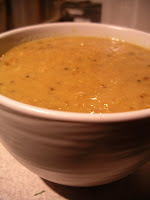
Fry the mustard and cumin seeds in oil or butter. Once they start to pop, add the onions, garlic, ginger, and chilis and cook until onions are tender. Something like this:


Add the powdered spices and salt and fry a bit longer. Add the lentils, coconut milk, and enough water to cook the lentils and bring to a simmer. Stir occasionally and add more water if needed. Once the lentils are nice and soft, you are ready to serve over white rice.


Mmmmm! Daalish!

Thursday, March 5, 2009

Parmigiana~!

Hi there. First guest blog! By Enri! Okay, enough with the exclamation points.

So, onto Enri's mom's parmigiana di melanzane (eggplants, aubergines, berenjenas, 茄子, еггплантс, etc.).

Here's a picture of the ingredients you'll need (very thoughtful Enri):


First, slice some eggplants and soak under salt for about an hour. Next, prepare a plain tomato sauce with basil/carrots/onions or garlic (cooking time about 40min) (ingredient A). Then, prepare some boiled eggs and when cold pile and slice in small cubes (ingredient B). Cut up some provola (original recipe says "provola silana") into little cubes (ingredient C) and grate some grana padano (ingredient D). Next, fry the eggplants in deep oil (different schools different oils, corn oil was used in this version, olive oil can also be used).

Now assemble your parmigiana as follows:
1. put bread crumbs in a pan that will later go into the oven (so, oven-compatible pan, understood?)
2. cover with fried eggplants to make a continuos layer
3. cover this first layer with ingredients A, B, C, and D spreading uniformly
4. continue for 2-3 layers repeating steps 2 and 3


Now put the pan into the oven for 30-40 mins.

And that's it!

Tuesday, March 3, 2009

Who Wants Some Chowdah?

We decided it was time to take a break from Indian and Italian last night. A hearty fish chowder seemed like a good idea, especially given the inhumanly cold Chicago weather. The chowder (or chowdah as my mom likes to say) that we made was pretty straight forward to prepare and very tasty. Here are the ingredients you'll need:

120 g of bacon (from applegate farms, certified organic and humane)
1 large onion
4 cloves garlic
1 carrot (finely chopped)
2 ribs celery (finely chopped)
1 jalapeño pepper
butter
1 to 2 pounds potatoes
1 liter of chicken stock
3 large tomatoes
2 cups corn (freshly removed from the cob or frozen)
1 kg white fish (we used tilapia and cod)
basil
cream

Chop the bacon and slowly fry in a large, heavy bottomed pot. Once the bacon is nice and crispy, drain off some of the bacon grease (but not all), and add some butter, the onions, garlic, carrot, celery, and jalapeño and cook until onions are nice and not crispy. Add the potatoes and the stock and cook for a few minutes. Taste to see if it could use some salt at this point. Next add the tomatoes and corn and cook until the potatoes are tender. If you'd like to make the chowder a bit thicker, you can mash some of the potatoes against the side of the pot. Now you can add the fish, cut into medium-sized cubes. Cook for 10-15 minutes or until fish looks done. Add a few bunches of freshly chopped basil and up to about a cup of cream depending on how creamy you like your chowder. We served it up with some nice crusty french bread, topped with some feta cheese, and with some white wine. Here is how it looked: