
Thursday, March 10, 2011
CSA'ing
No cooking was done tonight, but that didn't stop me from getting more ingredients! I just got my first farm share from the CSA I joined. CSA = Community Supported Agriculture. If you don't know about it already, the way it works is that you basically sign up to receive a regular supply of vegetables from a local farm, paying a big chunk of it in advance. This helps the farmer with their cash flow, and allows you to have a closer relationship with the people from whom you buy your food. Each week (or every other week) you get a box of whatever veggies are in season, so you have to figure out what to make with what you get. I signed up for a 7-week spring share with Rockville Market Farm, located in Starksboro, VT. Every other week I can pick up my shipment at the grocery store by my apartment from some friendly folks that work on the farm. Since there are not a whole lot of veggies in season in Massachusetts right now, they send some greenhouse crops along with some locally sourced produce like eggs, cheese, and bread. Today I got some potatoes, carrots, turnips, beets, and onions along with some goat cheese, eggs, and a big loaf of bread! I don't think I've ever cooked with turnips or beets before, so it will force me to try something new! Whatever that is, I will try to post it here!


Wednesday, March 9, 2011
Martha's Chocolate Chocolate Cookies
Well, I am still on a cooking streak, but tonight I had plenty of leftovers, so I decided to make some dessert. Dessert is spelled with 2 s'es because unlike desert, which has 1 s, you would like to go through dessert twice. At least that is what I was told!
This is based on a recipe, but it is firmly stored in my head. I didn't look it up. This is what I am trying to do here. The recipe belongs to Martha Stewart, who it turns out, knows what she is talking about when it comes to cookies.
I happen to recall the recipe because I made it several times on the occasion of my last trip to Florida. I made here a half-recipe since it is a bit dangerous to have these sitting around. It makes about 6 or 7 cookies.
Pre-heat the oven to 350 F.
1/2 cup flour, 1/4 cup cocoa powder, a pinch of salt, a pinch of baking soda

1 egg beaten together with 3/4 cup of sugar

75 g chocolate (I went with 72% Green and Black's Organic Baking Chocolate), melted in a double boiler with 1/2 stick of unsalted butter

Mix the melted butter and chocolate with the beaten egg and sugar

Mix the butter, chocolate, egg, sugar mixture with the flour mixture, adding about as many chocolate chips are you feel like!

Use a spoon to lay out the dough on a cookie sheet lined with parchment paper. Sprinkle the cookies with sea salt (Martha didn't know about that!)

Bake for about 12-13 minutes at 350 F, let cool, enjoy!

This is based on a recipe, but it is firmly stored in my head. I didn't look it up. This is what I am trying to do here. The recipe belongs to Martha Stewart, who it turns out, knows what she is talking about when it comes to cookies.

I happen to recall the recipe because I made it several times on the occasion of my last trip to Florida. I made here a half-recipe since it is a bit dangerous to have these sitting around. It makes about 6 or 7 cookies.
Pre-heat the oven to 350 F.
1/2 cup flour, 1/4 cup cocoa powder, a pinch of salt, a pinch of baking soda

1 egg beaten together with 3/4 cup of sugar

75 g chocolate (I went with 72% Green and Black's Organic Baking Chocolate), melted in a double boiler with 1/2 stick of unsalted butter

Mix the melted butter and chocolate with the beaten egg and sugar

Mix the butter, chocolate, egg, sugar mixture with the flour mixture, adding about as many chocolate chips are you feel like!

Use a spoon to lay out the dough on a cookie sheet lined with parchment paper. Sprinkle the cookies with sea salt (Martha didn't know about that!)

Bake for about 12-13 minutes at 350 F, let cool, enjoy!

Tuesday, March 8, 2011
Aloo Gobi
The great thing about cooking indian food everyday is that is that you can always have one or two curries leftover from the previous days and make your own little indian buffet! Today the cauliflower was calling out to me, so I decided to make some Aloo Gobi. Aloo = potato, gobi = cauliflower. That pretty much sums it up.
I stopped by the store to pick up some Ghee instead of using olive oil. Ghee has a great, rich dairy smell when you are frying the garlic and spices. As it should, it is 100% Pure COW!

In addition to the pure cow, I had the following on hand, listed in the order in which they are added to the pot:
step 1:
several curry leaves
2 teaspoons cumin seeds
1 teaspoon coriander seeds
step 2:
4 cloves garlic
1 thumb-sized piece of ginger, minced
4-5 hot chiles
step 3:
1-2 teaspoons turmeric
step 4:
4-5 small potatoes, cubed
1 small head of cauliflower, cut into bite-sized pieces
salt
step 5;
tomato
salt
step 6:
cilantro
lemon
Heat 1-2 tablespoons of Ghee, and add the cumin seed, coriander seed, and curry leaves. Fry until the seeds start to brown/pop, then add the minced garlic, ginger, and hot pepper. Fry these for a good minute or two before adding the turmeric. Fry the spice mixture for just a bit then add the potato and cauliflower. Add a bit of salt, adjust the heat (if it is too dry maybe add a bit more ghee), and cook covered until the potato and cauliflower are not quite done. At this point you can add the chopped tomato and more salt if needed (taste it!) and cook until the potato and cauliflower are nice and tender, but not mushy. Top off with some lemon and chopped cilantro! I added some leftover rajma and ate it up with some more flat bread. Enjoy!

I stopped by the store to pick up some Ghee instead of using olive oil. Ghee has a great, rich dairy smell when you are frying the garlic and spices. As it should, it is 100% Pure COW!

In addition to the pure cow, I had the following on hand, listed in the order in which they are added to the pot:
step 1:
several curry leaves
2 teaspoons cumin seeds
1 teaspoon coriander seeds
step 2:
4 cloves garlic
1 thumb-sized piece of ginger, minced
4-5 hot chiles
step 3:
1-2 teaspoons turmeric
step 4:
4-5 small potatoes, cubed
1 small head of cauliflower, cut into bite-sized pieces
salt
step 5;
tomato
salt
step 6:
cilantro
lemon
Heat 1-2 tablespoons of Ghee, and add the cumin seed, coriander seed, and curry leaves. Fry until the seeds start to brown/pop, then add the minced garlic, ginger, and hot pepper. Fry these for a good minute or two before adding the turmeric. Fry the spice mixture for just a bit then add the potato and cauliflower. Add a bit of salt, adjust the heat (if it is too dry maybe add a bit more ghee), and cook covered until the potato and cauliflower are not quite done. At this point you can add the chopped tomato and more salt if needed (taste it!) and cook until the potato and cauliflower are nice and tender, but not mushy. Top off with some lemon and chopped cilantro! I added some leftover rajma and ate it up with some more flat bread. Enjoy!

Monday, March 7, 2011
Rajmahal
Um... hello? Is anyone still out there? Well, I've decided to get this thing back up and running after a ridiculously long break. I mean the last post that I contributed was almost two years ago. Crazy! A lot has happened since then, but it is the move to Boston that made me decide to start writing here again. My new place in Central Square, Cambridge is literally a two minute walk to the Harvest Coop grocery store and an Indian market, making them both practically an extension of my kitchen. That said, I'd like to cook something new as close to every night as possible. We'll see how long it lasts, but the plan is also not to rely on any recipes and just come up with stuff based on what is already in my head. Part of how this works is that I walk into the grocery store and check out what vegetables look good, go into a trance-like state while I ponder possible combinations, apologize for blocking the aisle while in said trance-like state, and then come home and cook.
Rajma. By the way, being that I am right next to the Indian market, most of these are going to be Indian dishes. I should also say that, since I am making most of this up, the dishes are likely to be a bit removed from the standard formula. I would say that any piece of seemingly factual information provided here is highly suspect, so proceed with a pinch of salt. Rajma is an Indian curry centered around red kidney beans. For some reason I also think it would like to include some paneer. Here are the ingredients:
olive oil (ghee is better, but I forgot to buy it!)
several curry leaves
1-2 teaspoons cumin seeds
4 cloves garlic
1 thumb-sized piece of ginger, finely chopped
4-5 hot green chiles
6oz paneer (homemade or from the store)
3 medium-sized tomatoes, chopped
15oz can of red kidney beans (dried would be better, but that requires forethought)
salt to taste
cilantro
lemon
Start out by heating some oil in a wide pan and add the curry leaves and cumin seeds. The smell of curry leaves by the way is one of my favorite smells ever. If you can find some, I highly recommend. If you can't get them, you can still make the dish without them, but that is sad. Another side note. I am trying to make the Indian dishes with a minimum number of different spices to see what the base of flavor really is for each dish.
Once the cumin seeds start to pop, throw in the cubed paneer, allowing it to brown on one side. When it seems like a good time to do so, toss in the chopped tomato and salt. I had always thought that before adding the tomato you should take out the paneer and set aside until the end. I didn't feel like doing it here though, and it came out great all the same.
Allow the tomato to cook down into a nice sauce, smashing down the tomato bits with a wooden spoon to help things along. Once things look to be at the desired level of sauciness, add in the kidney beans, which have been removed from their can and rinsed. Stir the beans around to incorporate into the sauce, adding additional salt if needed. Finally top off with a good amount of chopped cilantro and juice from about half a lemon. The lemon and the cilantro really made the dish come together nicely! Rather than serving with rice, I enjoyed my meal with some Indian flat bread (methi paratha) from the Indian market!

Rajma. By the way, being that I am right next to the Indian market, most of these are going to be Indian dishes. I should also say that, since I am making most of this up, the dishes are likely to be a bit removed from the standard formula. I would say that any piece of seemingly factual information provided here is highly suspect, so proceed with a pinch of salt. Rajma is an Indian curry centered around red kidney beans. For some reason I also think it would like to include some paneer. Here are the ingredients:
olive oil (ghee is better, but I forgot to buy it!)

several curry leaves
1-2 teaspoons cumin seeds
4 cloves garlic
1 thumb-sized piece of ginger, finely chopped
4-5 hot green chiles
6oz paneer (homemade or from the store)
3 medium-sized tomatoes, chopped
15oz can of red kidney beans (dried would be better, but that requires forethought)
salt to taste
cilantro
lemon
Start out by heating some oil in a wide pan and add the curry leaves and cumin seeds. The smell of curry leaves by the way is one of my favorite smells ever. If you can find some, I highly recommend. If you can't get them, you can still make the dish without them, but that is sad. Another side note. I am trying to make the Indian dishes with a minimum number of different spices to see what the base of flavor really is for each dish.
Once the cumin seeds start to pop, throw in the cubed paneer, allowing it to brown on one side. When it seems like a good time to do so, toss in the chopped tomato and salt. I had always thought that before adding the tomato you should take out the paneer and set aside until the end. I didn't feel like doing it here though, and it came out great all the same.
Allow the tomato to cook down into a nice sauce, smashing down the tomato bits with a wooden spoon to help things along. Once things look to be at the desired level of sauciness, add in the kidney beans, which have been removed from their can and rinsed. Stir the beans around to incorporate into the sauce, adding additional salt if needed. Finally top off with a good amount of chopped cilantro and juice from about half a lemon. The lemon and the cilantro really made the dish come together nicely! Rather than serving with rice, I enjoyed my meal with some Indian flat bread (methi paratha) from the Indian market!

Tuesday, December 15, 2009
Padellata di funghi, castagne e scalogno
i.e.: mushroom, chestnut and shallot saute’ – directly from Italy
(serves 6)
350 g chestnuts, blanched and peeled (but I used preserved all natural chestnuts, because peeling them is not the funnest thing in the world)
2 garlic cloves
2 rosemary sprigs
4 small shallots, peeled and cut in halves
4 green cabbage leaves, cut in stripes
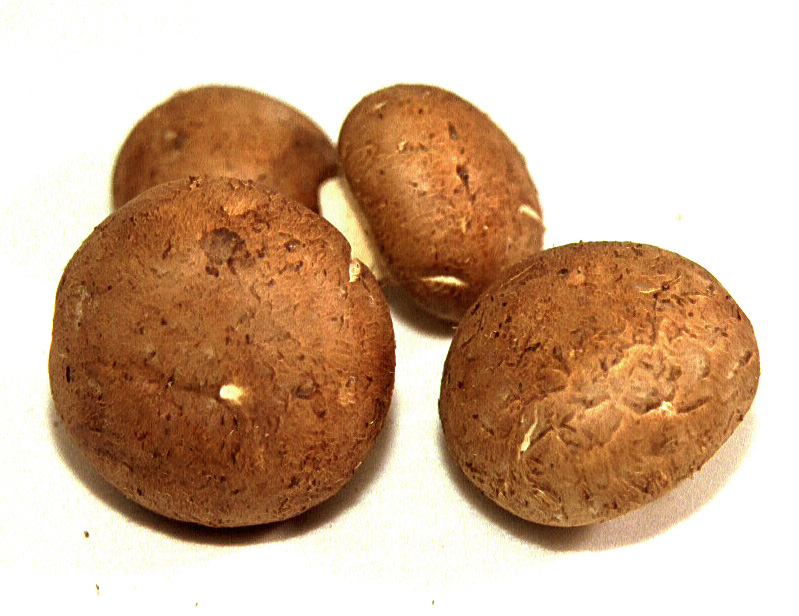
250 g chanterelle mushrooms (actually, this time I used crimini mushrooms and it was delicious all the same – the chanterelles add a nice touch of yellow, though)
1 cup of white wine
½ cup of vegetable broth
Sauté the garlic and the shallots in 4-5 tablespoons of oil. Add the chestnuts (only if they’re not precooked, otherwise wait until the end, to keep them from getting mushy). Cook for about 5 minutes, then add the mushrooms and the rosemary and cook for a few more minutes.

Add the white wine and let simmer on high heat until almost dry.
Season to taste with salt and pepper.
Add the cabbage and pour the broth.

If you’re using precooked chestnuts, add them NOW!
Let simmer for another 10 minutes.

Ecco fatto! Perfect as a side for meat – happy meat, of course.
Tuesday, September 15, 2009
Scrumbtious apple+ crumble
Hello everyone,
Don’t you think there isn’t enough dessert in this blog? Well, I definitely do, so here’s an easy and, of course, delicious recipe for y’all sweet-toothed fruit lovers!
This cake is traditionally made with apples, but I guess any fruit – or fruit combination – will do. The last time I prepared it, I used apples, nectarines and raspberries:
2-3 apples (golden delicious or granny smith)
2-3 nectarines
about 100 g raspberries
For the crumbles:
150 g sugar (caster or brown)
150 g flour
100 g butter, cold (I prefer salted)
Cinnamon if you like it
Preheat the oven to 400*F.
Peel the apples, cut them into quarters and then each quarter in 2. Do the same with the nectarines (I didn’t peel them, actually).
Arrange the fruit pieces in a buttered 23x20 cm rectangular oven dish.

Mix the flour and the sugar. With your fingertips or a fork, rub the butter into the flour mixture until it forms coarse crumbs (if you don’t get crumbs but a more uniform dough, just leave it for 15 min in the fridge and it should acquire the right texture).
Sprinkle the fruit with the crumbs.

That’s it!
Now bake in the oven for about 30 min, and once the top is golden brown and the fruit is cooked, let cool at room temperature.

Don’t you think there isn’t enough dessert in this blog? Well, I definitely do, so here’s an easy and, of course, delicious recipe for y’all sweet-toothed fruit lovers!
This cake is traditionally made with apples, but I guess any fruit – or fruit combination – will do. The last time I prepared it, I used apples, nectarines and raspberries:
2-3 apples (golden delicious or granny smith)
2-3 nectarines
about 100 g raspberries
For the crumbles:
150 g sugar (caster or brown)
150 g flour
100 g butter, cold (I prefer salted)
Cinnamon if you like it
Preheat the oven to 400*F.
Peel the apples, cut them into quarters and then each quarter in 2. Do the same with the nectarines (I didn’t peel them, actually).
Arrange the fruit pieces in a buttered 23x20 cm rectangular oven dish.
Mix the flour and the sugar. With your fingertips or a fork, rub the butter into the flour mixture until it forms coarse crumbs (if you don’t get crumbs but a more uniform dough, just leave it for 15 min in the fridge and it should acquire the right texture).
Sprinkle the fruit with the crumbs.
That’s it!
Now bake in the oven for about 30 min, and once the top is golden brown and the fruit is cooked, let cool at room temperature.
And eat! :)
Monday, August 31, 2009
Corn Relish-ious!
Okey doke! So last weekend, Todd and I got a pile of veggies from our CSA as usual, and knowing that we were likely to get more corn than we could shake a stick at (at least in a single week) I figured I should look into new and interesting ways of processing corn! We had already frozen some earlier this summer, so that option was out. Looking around online, I found a few recipes for corn relish.
Here's what you need to make this happen:
4 ears of corn
1 onion
1 red bell pepper
1 sweet green pepper
1/8 cup sugar
1 cup vinegar
1/2 tbsp salt
1/2 tsp celery seed
1/2 tsp mustard seed
1/2 tbsp dry mustard
1/4 tsp turmeric
If you want to add a spicy kick to it, add some spicy peppers...I think the ingredients are pretty flexible so long as you maintain a safe level of acidity overall. I wanted keep the corn sweet, so I didn't take that route.
Now, how it's done:
1 - Blanche the corn in boiling water for 5 minutes, then transfer to ice cold water for 5 minutes. Once cool, cut the corn off the cob. This should yield about 2 cups, give or take.
2 - While that's going on, chop up your onion and peppers into itty bitty bits. I obliterated them in my food processor, which was super-quick. If you don't have a food processor, buy one (or get married so that other people give it to you)! :) It's totally worth it.
3 - Combine the chopped up onions, peppers, salt, sugar, vinegar, mustard seeds and celery seeds in a large deep saute pan and bring to a boil on medium heat. Once boiling, simmer 5 minutes.
 4 - Add dry mustard, turmeric and corn to the mixture and simmer another 5 minutes.
5 - If your mixture feels too liquidy (which it will if you obliterated your veggies in your handy dandy food processor like I did) you'll want to add a bit of a flour/water mixture to thicken it up slightly. Mix 1/4 cup of flour with a little more than a 1/4 cup of water to make the paste, then add to the pan. Stir continuously, as adding the flour mixture will lead to a tendency for the food to stick to the pan.
6 - Ok, so while all that stuff was going on, you should have been preparing your jars and water bath for canning. Take the pan off the heat and fill your prepped jars with the relish, leaving a 1/2" headspace and process for 20 minutes in a boiling water canner. You should get about 2.5 pints from this recipe.

If you store the cans in a cool, dry place, the relish will be good for a year or so. Apparently it's quite tasty with catfish or a burger. We'll let you know when we give that a shot a few months down the road. In the meantime, I had the leftovers that didn't fit into the jars with my salad for dinner today. Look how pretty!

Here's what you need to make this happen:
4 ears of corn
1 onion
1 red bell pepper
1 sweet green pepper
1/8 cup sugar
1 cup vinegar
1/2 tbsp salt
1/2 tsp celery seed
1/2 tsp mustard seed
1/2 tbsp dry mustard
1/4 tsp turmeric
If you want to add a spicy kick to it, add some spicy peppers...I think the ingredients are pretty flexible so long as you maintain a safe level of acidity overall. I wanted keep the corn sweet, so I didn't take that route.
Now, how it's done:
1 - Blanche the corn in boiling water for 5 minutes, then transfer to ice cold water for 5 minutes. Once cool, cut the corn off the cob. This should yield about 2 cups, give or take.
2 - While that's going on, chop up your onion and peppers into itty bitty bits. I obliterated them in my food processor, which was super-quick. If you don't have a food processor, buy one (or get married so that other people give it to you)! :) It's totally worth it.
3 - Combine the chopped up onions, peppers, salt, sugar, vinegar, mustard seeds and celery seeds in a large deep saute pan and bring to a boil on medium heat. Once boiling, simmer 5 minutes.
 4 - Add dry mustard, turmeric and corn to the mixture and simmer another 5 minutes.
5 - If your mixture feels too liquidy (which it will if you obliterated your veggies in your handy dandy food processor like I did) you'll want to add a bit of a flour/water mixture to thicken it up slightly. Mix 1/4 cup of flour with a little more than a 1/4 cup of water to make the paste, then add to the pan. Stir continuously, as adding the flour mixture will lead to a tendency for the food to stick to the pan.
6 - Ok, so while all that stuff was going on, you should have been preparing your jars and water bath for canning. Take the pan off the heat and fill your prepped jars with the relish, leaving a 1/2" headspace and process for 20 minutes in a boiling water canner. You should get about 2.5 pints from this recipe.

If you store the cans in a cool, dry place, the relish will be good for a year or so. Apparently it's quite tasty with catfish or a burger. We'll let you know when we give that a shot a few months down the road. In the meantime, I had the leftovers that didn't fit into the jars with my salad for dinner today. Look how pretty!

Subscribe to:
Posts (Atom)